- Published on
Streamline Your Spreadsheets - Automating Data Transfers with Apps Script

Stop Copying and Pasting: Automate Your Google Sheet Data Transfers
Juggling data across multiple Google Sheets can feel like a never-ending game of copy and paste. It's time-consuming, tedious, and prone to errors. But what if there was a better way? Enter Google Apps Script: a powerful tool that can automate this entire process, freeing you up to focus on what really matters. This guide will walk you through how to set up automated data transfers between your spreadsheets, even if you're not a coding whiz.
Why Automate Data Transfer?
Think about how much time you spend manually transferring data between spreadsheets. Now imagine reclaiming those hours. Automation not only saves time, but it also dramatically reduces the risk of human error. Plus, it ensures consistency and allows you to focus on analysis and decision-making, rather than tedious data entry.
Let's say you consolidate weekly sales data from different teams into a master report. Manually copying and pasting this information is a chore. With Apps Script, you can automate this weekly task, ensuring your report is always up-to-date and accurate.
Getting Started with Apps Script
Apps Script is a cloud-based platform that lets you write JavaScript code to automate tasks across Google Workspace apps (like Sheets) and other services. It's surprisingly easy to use, even if you're new to coding.
Before diving into the script, let’s set up our environment. Make sure you have at least two Google Sheets: one as the source (where the data originates) and one as the destination (where the data will be copied to).
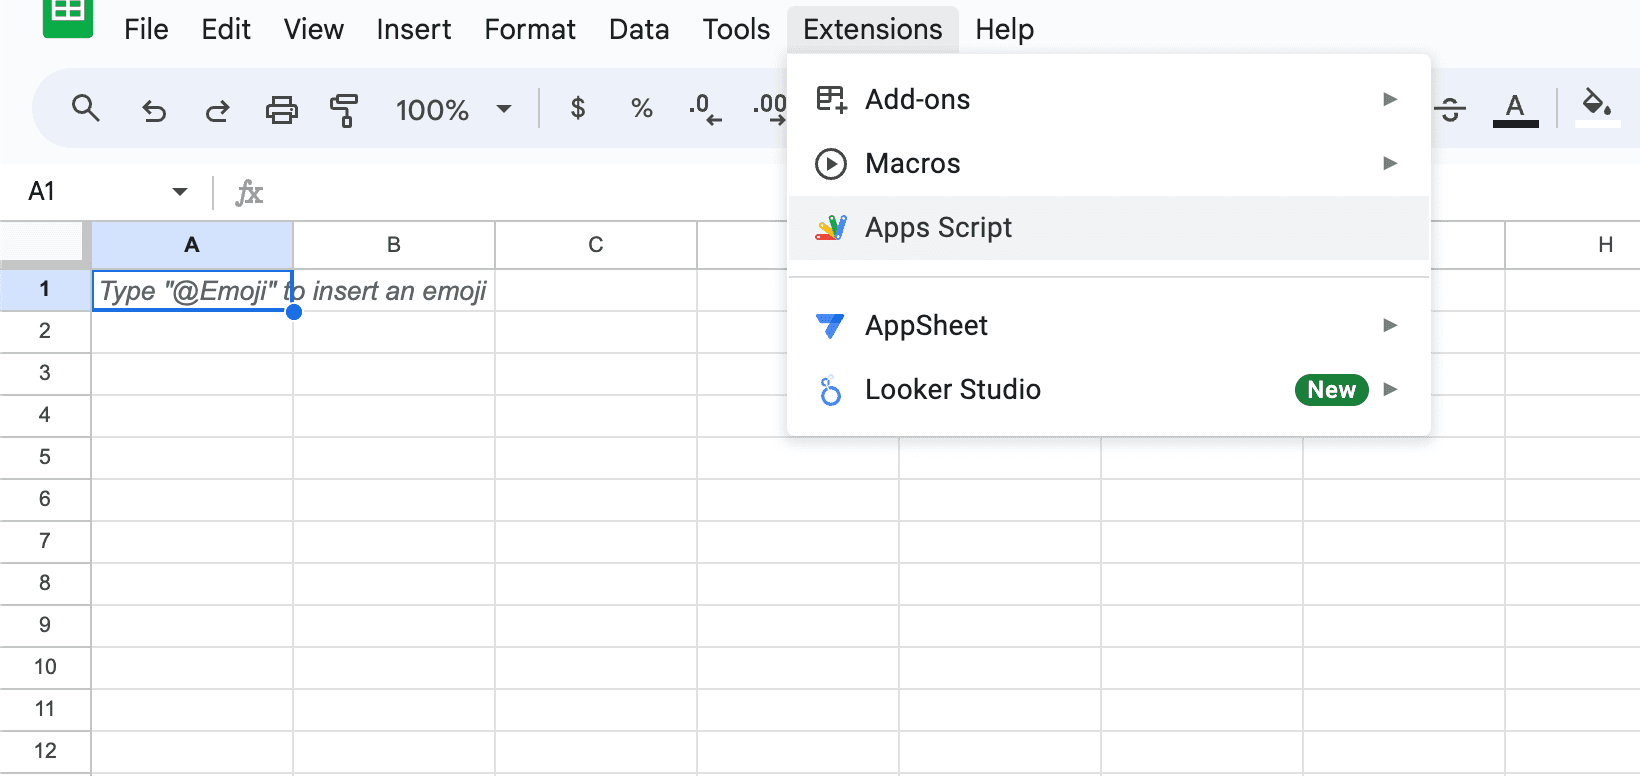
First, open your destination Google Sheet (where you want the data to end up). Go to "Extensions" > "Apps Script". This will open the Apps Script editor in a new tab. This is where the magic happens!

Your First Data Transfer Script
Here’s a simple script to copy data from one sheet to another:
function copyData() {
  // Source Spreadsheet and Sheet Details
  const sourceSpreadsheet = SpreadsheetApp.openById('SOURCE_SPREADSHEET_ID');
  const sourceSheet = sourceSpreadsheet.getSheetByName('SOURCE_SHEET_NAME');
  const sourceData = sourceSheet.getDataRange().getValues();

  // Destination Spreadsheet and Sheet Details
  const destinationSpreadsheet = SpreadsheetApp.openById('DESTINATION_SPREADSHEET_ID');
  const destinationSheet = destinationSpreadsheet.getSheetByName('DESTINATION_SHEET_NAME');

  // Clear the destination sheet (optional)
  destinationSheet.clearContents();

  // Write the data to the destination sheet
  destinationSheet.getRange(1, 1, sourceData.length, sourceData[0].length).setValues(sourceData);
}
Remember to replace SOURCE_SPREADSHEET_ID, SOURCE_SHEET_NAME, DESTINATION_SPREADSHEET_ID, and DESTINATION_SHEET_NAME with your actual spreadsheet and sheet names. You can find the spreadsheet ID in the URL of your Google Sheet.
Scheduling the Automation
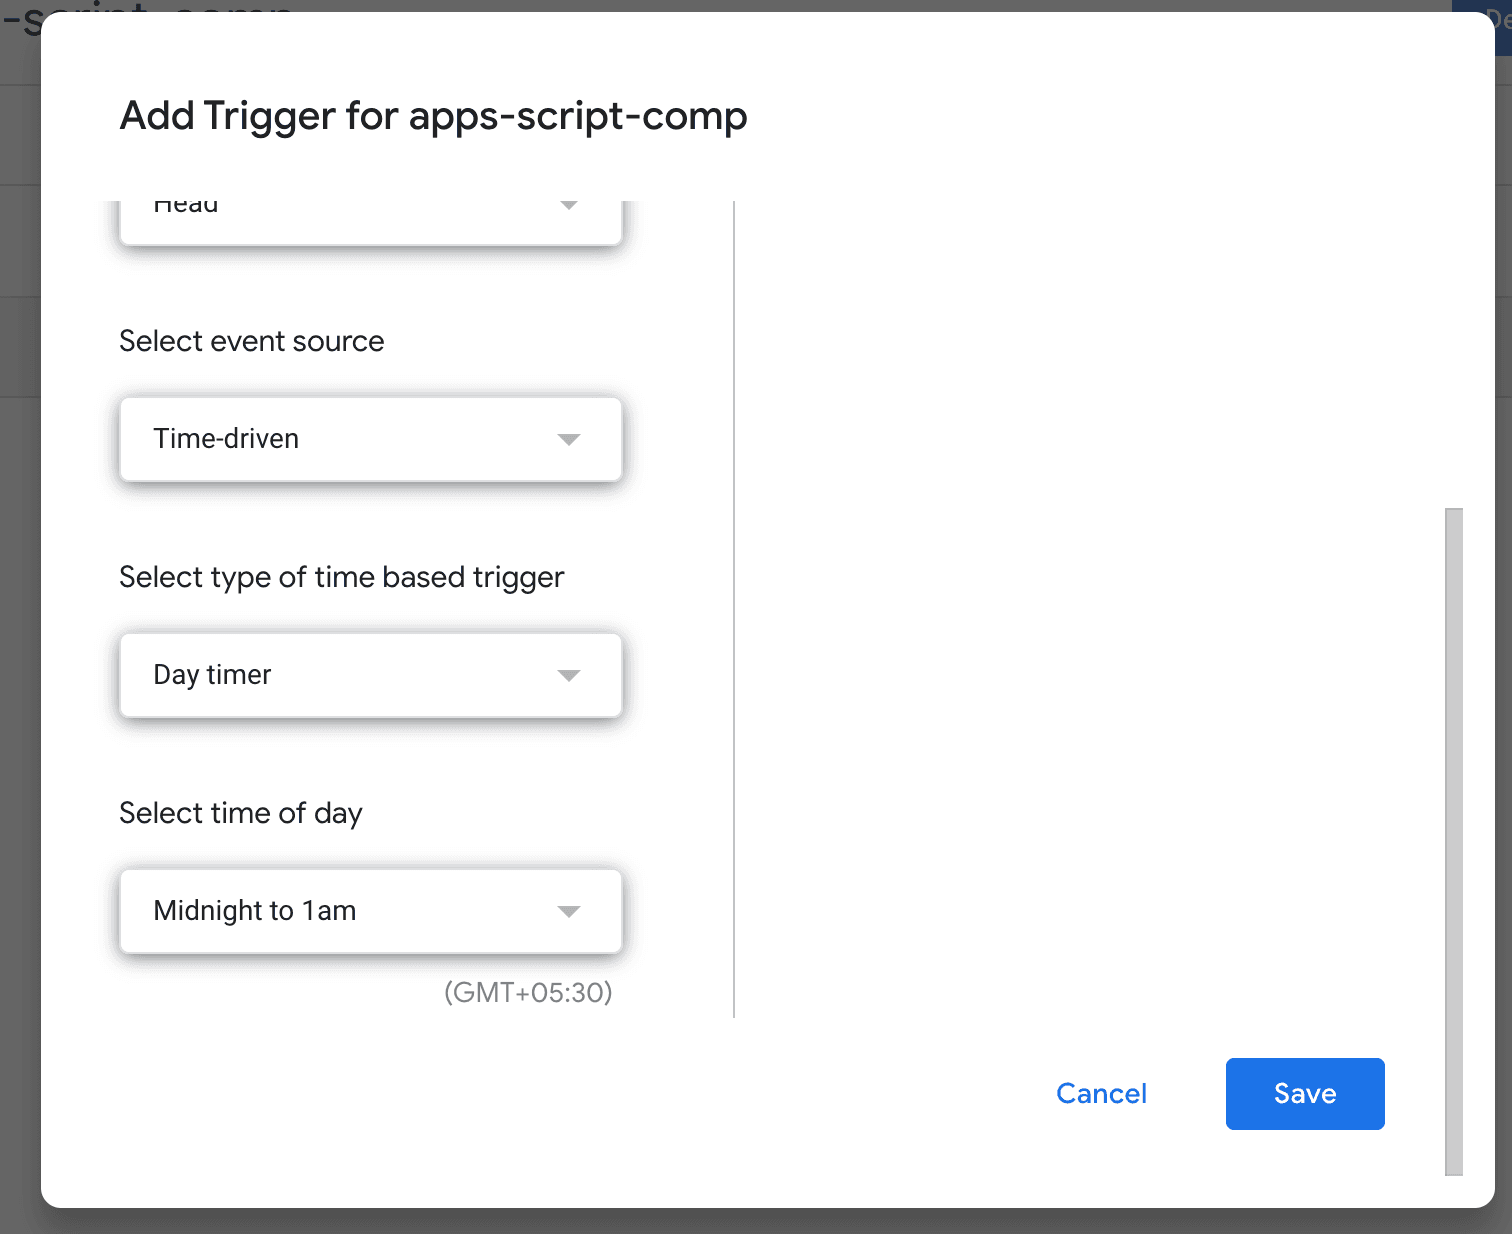
Running the script manually is a good start, but the real power comes from automation. In the Apps Script editor, click the clock icon ("Triggers") in the sidebar. Then click "Add Trigger". Choose copyData as the function to run, and set the frequency (e.g., hourly, daily, weekly). Now, your data transfers will happen automatically!
Handling Errors and Staying Informed
Automation is fantastic, but things can go wrong. It’s important to handle potential errors and set up notifications to alert you if something fails. Here’s an improved version of our script with error handling and email notifications:
function copyData() {
  try {
    var sourceSpreadsheet = SpreadsheetApp.openById('SOURCE_SPREADSHEET_ID')
    var sourceSheet = sourceSpreadsheet.getSheetByName('SOURCE_SHEET_NAME')
    var sourceRange = sourceSheet.getDataRange()
    var data = sourceRange.getValues()

    var destinationSpreadsheet = SpreadsheetApp.openById('DESTINATION_SPREADSHEET_ID')
    var destinationSheet = destinationSpreadsheet.getSheetByName('DESTINATION_SHEET_NAME')
    destinationSheet.clear()
    destinationSheet.getRange(1, 1, data.length, data[0].length).setValues(data)
  } catch (error) {
    // Log the error for debugging
    Logger.log(`Error: ${error}`);

    // Send yourself an email notification
    MailApp.sendEmail('your-email@example.com', 'Data Transfer Error', `An error occurred: ${error}`);
  }
}
Expanding Your Automation Toolkit
Once you’re comfortable with the basics, you can add more features. For example, you can:
- Append data: Instead of clearing the destination sheet, add new data to the next available row.
function appendData() {
  var sourceSpreadsheet = SpreadsheetApp.openById('SOURCE_SPREADSHEET_ID')
  var sourceSheet = sourceSpreadsheet.getSheetByName('SOURCE_SHEET_NAME')
  var sourceRange = sourceSheet.getDataRange()
  var data = sourceRange.getValues()

  var destinationSpreadsheet = SpreadsheetApp.openById('DESTINATION_SPREADSHEET_ID')
  var destinationSheet = destinationSpreadsheet.getSheetByName('DESTINATION_SHEET_NAME')
  var lastRow = destinationSheet.getLastRow()
  destinationSheet.getRange(lastRow + 1, 1, data.length, data[0].length).setValues(data)
}
- Filter data: Transfer only specific data based on criteria.
- Format data: Apply formatting to the destination sheet.
Testing and Debugging
Thorough testing is essential. Run the script manually a few times with sample data. Check the "Executions" and "Logs" in the Apps Script editor to monitor progress and troubleshoot any issues. Adding Logger.log() statements throughout your script can help you track variables and identify errors.
Real-World Applications
Automating data transfers has countless applications. Imagine automating:
- Reporting: Consolidating data from different sources into a single report.
- Project Management: Syncing project data between different sheets.
- Inventory Management: Updating inventory levels automatically.
Embrace the Power of Automation
Apps Script empowers you to streamline your spreadsheet workflows, saving valuable time and improving accuracy. Start with a simple script, test thoroughly, and gradually add complexity as needed. With a little effort, you can transform your spreadsheets from manual data entry hubs into efficient, automated systems. Happy Automating!
